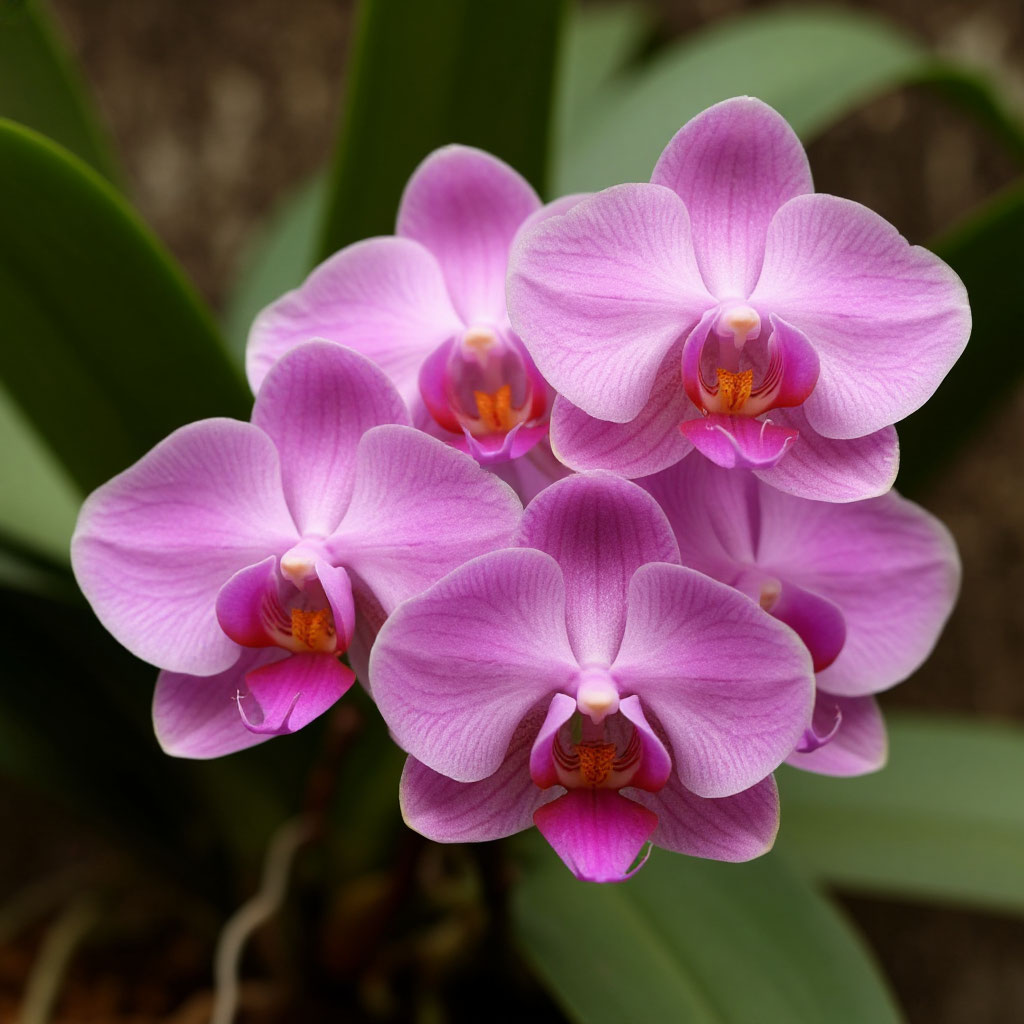
Orchids are one of the most beautiful houseplants, but many flower growers face a problem: the orchid does not bloom, although the leaves grow well. Why is this happening and how to make an orchid bloom? In this article, we will analyze the main reasons for the lack of buds, tell you about proper care, top dressing for orchid flowering, and the nuances of planting an orchid so that it pleases you with lush flowers.
At the end you can download a checklist in which you’ll find the exact light, temperature drop, watering, humidity, feeding, potting, and spike-care steps — plus a quick feeding schedule and troubleshooting tips — to trigger orchid blooms.
Why the orchid doesn’t bloom
An orchid is a capricious plant, and if it refuses to bloom, it means that something in the care is going wrong. Let’s look at all the possible reasons why the orchid does not produce a peduncle, and how to fix it.
Lack of lighting
Orchids are light-loving plants, and if they lack light, they actively grow leaves, but do not bloom. This is especially true for phalaenopsis, which naturally grow in tropical forests, receiving diffused light through the foliage of trees. At home, they need bright, but not direct sun. If the orchid stands in the back of the room or on the north window, there may not be enough light.
How can I tell if the problem is in the lighting?
- The leaves turn dark green (in a healthy orchid, they should be light green with a slight yellowish tinge).
- New leaves grow smaller than old ones.
- The plant does not produce a peduncle even a year after the last flowering.
Incorrect watering
Orchids do not tolerate overdrying or waterlogging. Their roots must have time to dry out between waterings, otherwise they begin to rot. But if you keep the plant in a constant drought, it goes into survival mode and does not waste energy on flowering.
Signs of improper watering:
- When overflowing: the roots become brown, soft, the substrate does not dry out for a long time, the leaves turn yellow and soften.
- When under-watering: the roots turn gray and shrivel, the leaves lose their turgor, become sluggish.
No temperature changes
In nature, the orchid does not bloom after the rainy season, when the nights become cooler. If the apartment has a constant temperature (for example, +24°C both during the day and at night), the plant does not receive a signal to bloom.
Incorrect top dressing
If an orchid is fertilized with compounds with a high nitrogen content, it will actively grow leaves, but not bloom. For flowering, you need phosphorus and potassium.
Unsuitable substrate or pot
If an orchid is planted in ordinary soil or too dense substrate, its roots suffocate and rot. Also, the problem may be in too large a pot – until the roots do not braid the entire volume, there will be no flowering.
Post-transplant stress
If the orchid has recently been transplanted, it can “fall silent” for 6-12 months until it adapts. At this time, it is important not to overfill it and not to fertilize it too actively.
The orchid does not bloom due to diseases and pests
The orchid does not bloom due to the presence of:
- Rot (black or brown spots on leaves and roots).
- Pests (scabies, mealybugs, spider mites).
How to make an orchid bloom
When a plant refuses to bloom despite good leaf growth, it can be frustrating. There are several effective ways to make an orchid bloom. Let’s take a detailed look at each method to help your orchid release its long-awaited flower stalks.
Don’t know how to stimulate flowering? One of the most effective ways is to create a stressful situation for the plant. In nature, orchids often bloom after a period of drought or temperature changes, which serve as a signal for the beginning of flowering. At home, we can mimic these natural cycles.
Try reducing watering by 2-3 weeks, allowing the substrate to dry completely between waterings. At the same time, provide a difference between the day and night temperature of about 5-7 degrees. For example, if the room temperature is +25°C during the day, then at night the temperature should drop to +18-20°C. This mode should be maintained for 3-4 weeks to see the appearance of a new peduncle.
Lighting plays a key role in the orchid blooming process. These plants need a sufficient amount of bright but diffused light. If your orchid stands on the north window or at the back of the room, try moving it to the east or west window.
In winter, when the light day is short, it is recommended to use phytolamps for additional illumination. The optimal length of daylight for stimulating flowering is 12-14 hours. It is important to remember that direct sunlight can cause leaf burns, especially in summer, so on hot days the plant should be shaded.

Proper top dressing for orchid blooming is another important factor. When the plant is in the active leaf growth phase, you can use fertilizers with an equal content of nitrogen, phosphorus and potassium (NPK 20-20-20). To stimulate flowering, you should switch to fertilizers with a high phosphorus content (for example, NPK 10-30-20).
Phosphorus promotes the laying of flower buds and the development of peduncles. Feed the orchid every 2-3 weeks, diluting the fertilizer 2-3 times stronger than indicated in the instructions. Before applying fertilizer, be sure to water the plant with clean water, so as not to burn the roots.
Special attention should be paid to the rest period. Many orchid species need to rest between blooms. At this time, you should slightly reduce watering and stop fertilizing. The dormant period usually lasts 1-2 months after the end of the previous flowering. Do not try to stimulate a new flowering immediately after the flowers fall – give the plant time to recover.
If all the above methods do not give results, but you do not stop thinking about how to make the orchid bloom, you can try treatment with preparations containing phytohormones. For example, cytokinin paste applied to the dormant buds of a peduncle can stimulate their awakening and the formation of new flower shoots. However, such products should be used with caution and strictly according to the instructions, since an overdose can harm the plant.
Do not forget about proper care of the peduncle after flowering. If the peduncle remains green, do not rush to cut it – new buds or babies may form on it. Only the fully dried part should be cut off. At the same time,make a cut 1-1.5 cm above the sleeping buds, it is from them that new lateral peduncles often develop.
Different types of orchids may require special approaches to stimulating flowering. For example, phalaenopsis are more unpretentious and can bloom almost all year round with proper care, while cattleya and dendrobia have a more pronounced dormant period and bloom strictly at certain times of the year. Therefore, before you stimulate flowering, try to learn as much as possible about the specific type of your orchid.
A healthy, well-groomed plant is sure to thank you with beautiful flowers. If the orchid doesn’t bloom despite your best efforts, it may just not be strong enough. In this case, it is worth reviewing the general conditions of detention – it may require a transplant, root system treatment, or just time to adapt. Be patient, continue to properly care for the plant, and you will definitely see the long-awaited flowers.
Phalaenopsis orchid care
Phalaenopsis orchid is one of the most popular species among indoor plant lovers due to its beauty and relative unpretentiousness. For regular flowering, it is important to follow a number of rules for care:

Watering system
- Frequency: Water the plant only when the substrate is completely dry. This is easily checked by lifting the pot: if it is light, then the water has evaporated.
- Watering method: It is best to water by immersing the pot in water at room temperature for about 15 minutes, allowing the water to soak well. Then allow the excess moisture to drain back into the container.
Lighting
Orchids need bright diffused light, direct sunlight can cause burns to the leaves. East or west orientation windows are ideal.
Air temperature and humidity
- The optimal temperature for keeping is from +18°C to +25°C during the day and about +15°C at night.
- It is important to keep the air humidity at 50-70%. If the room is dry, it is useful to regularly spray the space next to the plant with soft water.
Top dressing
Top Dressing for orchid blooming is carried out once a month with special fertilizers diluted twice as weakly as the recommended concentration.
Cropping
After the end of flowering, carefully trim the dried flower stalk with a sharp sterile tool just above the first live node.
Top dressing for orchid blooming
Orchids need a special approach to top dressing. Unlike other houseplants, they do not tolerate high concentrations of fertilizers and require a special composition of nutrients during different growing periods.
To stimulate flowering, orchids need three main elements:
- Phosphorus (P) – responsible for the formation of peduncles and buds, increases the brightness of flowers;
- Potassium (K) – increases immunity, promotes long-term flowering;
- Trace elements (boron, magnesium, iron) – prevent budding.
Optimal NPK ratio for flowering: 10-30-20 or 5-25-25. Nitrogen (N) should be kept to a minimum during this period, as it stimulates the growth of leaves, not flowers.
Top dressing for orchid blooming: the best compositions
- Specialized compositions for orchids: Pokon for orchids, Bona Forte “Beauty”, Greenworld Orchidendünger.
- Universal fertilizers with a high phosphorus content: “Uniflor-bud”, “Agricola for flowering plants”.
- Natural stimulants: succinic acid (1 tablet per 1 liter of water), glucose (1 tsp per liter of water).
How to properly feed orchids?
- Before applying fertilizer, be sure to water the plant with clean water, so as not to burn the roots.
- Dilute the fertilizer 2-3 times weaker than indicated in the instructions (orchids are very sensitive to salinity of the substrate).
- Use the immersion method-dip the pot in the fertilizer solution for 15-20 minutes.
Feeding frequency:
- during the period of active growth – 1 time in 2 weeks;
- during flowering – 1 time in 3-4 weeks;
- during the rest period – do not feed.
Orchid planting and replanting

The main reason why an orchid planting can provoke flowering lies in the peculiarities of the root system. It is covered with velamen-a spongy tissue that not only absorbs moisture, but also participates in photosynthesis. When the roots fill the entire volume of the pot and begin to come out, the plant receives a signal that the space for growth is exhausted, and it’s time to move on to reproduction – that is, to flowering. If the roots become too crowded and they begin to die from lack of air and light, the orchid, on the contrary, falls into stress and postpones flowering. Therefore, the moment for transplanting should be chosen with special care.
Preparation for planting orchids begins 2-3 weeks before the event itself. Experts recommend gradually reducing watering, so that the roots are slightly wrinkled and become more flexible – this reduces their fragility when transplanting.
On the day of the procedure, you need to prepare not just a new substrate, but create a special “therapeutic” version of it: to the standard mixture of medium-sized bark (1.5-2 cm), you should add 10-15% fine-grained charcoal (0.5 cm), which will work as a natural antiseptic, and 5-7% perlite for better aeration. This composition will not only provide optimal conditions for new roots, but also create a light stress that will stimulate flowering.
The technique of extracting a plant from an old pot requires special delicacy. You can not just pull the orchid by the leaves – this will damage the fragile roots. Carefully open the plastic pot with your hands (if it is flexible) or cut it lengthwise with scissors. When the plant is extracted, the most important stage begins-cleaning the roots.
It is important to find a balance between thorough removal of the old substrate and careful treatment of the root system. Each root should be carefully untangled with your fingers, removing pieces of bark that literally grow into the velamen. Special attention is paid to the areas at the base of the plant – this is where moisture most often accumulates and rot develops.
Planting orchids requires a careful approach. All sections must be sprinkled not just with crushed charcoal, but with a special mixture of cinnamon (3:1 ratio), which not only disinfects, but also stimulates the growth of new roots. If there are areas with signs of bacterial infections (sticky spots, black streaks), they should be treated with undiluted Maxim preparation or a special bactericidal paste for this type of flower. After that, the plant is left in the open air for at least 4 hours – this “air bath” helps to tighten all microtraumas.
When planting in a new pot, you need to correctly position the plant relative to the light source. Orchids have a “position memory” – if you abruptly change their orientation in relation to the light (for example, turn the other side to the window), they can drop their buds.
Therefore, you should mark the side that was facing the light in advance, and keep this position when transplanting. At the bottom of the pot is laid not just drainage, but a special “pillow” of large pieces of bark (3-4 cm), which creates an air layer. The roots are distributed in a circle, but not compacted – the substrate is only gently filled up, and the pot is lightly tapped on the sides for even distribution.
After the transplant, the most crucial period begins – adaptation. For the first 5-7 days, the plant is not watered at all – this allows all microtraumas on the roots to fully heal. Then begin careful watering by pouring along the edge of the pot (not by immersion!). Special attention is paid to air humidity – it is ideal to use a humidifier or place an orchid in a mini-greenhouse with a humidity of 70-80%. The first top dressing is carried out no earlier than 3 weeks later, using a half dose of fertilizer with a high phosphorus content (NPK 5-25-25).
Now you know how to make an orchid bloom. The main thing is proper care, timely feeding for orchid flowering and proper planting of orchids. Follow these tips and your beauty will delight you with bright colors!
Ready for buds? Grab the checklist: CD How to Make an Orchid Bloom — Checklist (PDF).